
Braeburn Thermostat Manual: A Comprehensive Guide
This guide offers detailed instructions for Braeburn thermostats‚ covering installation‚ operation‚ programming‚ troubleshooting‚ and compatibility with various HVAC systems.
Understanding Your Braeburn Thermostat Model
Braeburn offers a diverse range of thermostats‚ from non-programmable to advanced programmable models. Identifying your specific model is crucial for accessing the correct manual and support resources. The Braeburn 3020 1H/1C is a popular‚ though now discontinued‚ non-programmable option. Understanding the features of your model – like hold functionality and programming options – unlocks its full potential.
Different models support varying system types‚ including single-stage gas‚ oil‚ or electric. Knowing whether your system is low voltage is also essential. Referencing the model number‚ often found on the thermostat itself‚ will streamline troubleshooting and ensure compatibility when seeking assistance or replacement parts.

Identifying the Braeburn 3020 1H/1C Model
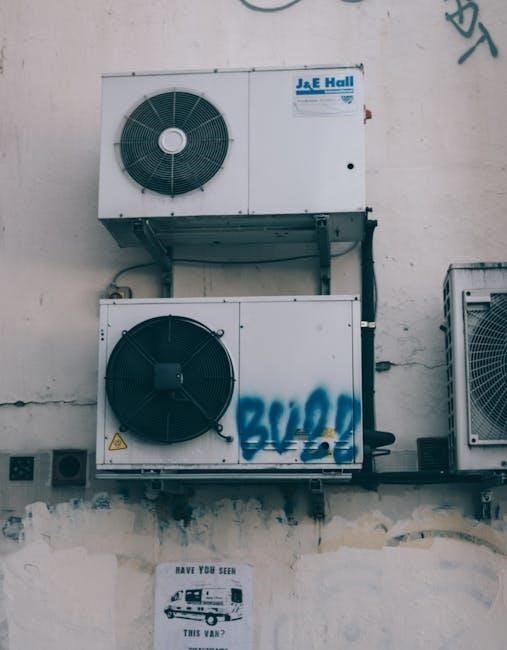
The Braeburn 3020 1H/1C is a non-programmable thermostat‚ recognizable by its simple interface and limited feature set. It’s designed for straightforward heating and cooling control in compatible systems. However‚ it’s important to note this model has been discontinued‚ meaning replacement parts may be harder to find.
Visually‚ it typically features a basic display and manual temperature adjustment controls. Its primary function is to maintain a set temperature‚ with a “Hold” button for overriding programmed settings. While user-friendly‚ its lack of programmability means it doesn’t offer energy-saving schedules. Confirming this model is the one you have is vital before seeking specific troubleshooting advice or manuals.

Thermostat Wiring Basics
Understanding thermostat wiring is crucial for successful installation and troubleshooting. Most systems utilize low-voltage wiring‚ typically an 18/7 or 18/8 cable containing multiple colored wires. Before starting‚ always turn off power to your HVAC system! Identifying each wire’s function is key – common colors include Red (power)‚ White (heat)‚ Yellow (cool)‚ Green (fan)‚ and Blue (common‚ often “C” wire).
The “C” wire provides constant power to the thermostat‚ essential for many modern models. If you have extra wires‚ they may be unused and safely tucked away. Posting pictures of your existing wiring (using Imgur or Reddit) can help experts provide accurate guidance.
Understanding Thermostat Wire Colors
Decoding thermostat wire colors is fundamental to proper installation. Red typically signifies 24V power‚ supplying energy to the thermostat. White usually controls the heating system‚ activating it when needed. Yellow manages cooling‚ initiating the air conditioning. Green operates the fan‚ circulating air throughout your home. The Blue wire is often the “C” wire‚ providing constant power – crucial for many Braeburn models.
However‚ color coding isn’t universal! Always verify wire functions with your HVAC system’s wiring diagram. If unsure‚ taking clear pictures and posting them online for assistance is highly recommended. Incorrect wiring can damage your system.

The Importance of the “C” Wire (Common Wire)
The “C” wire‚ or common wire‚ provides continuous 24V power to the thermostat. Many modern Braeburn thermostats require a C wire for reliable operation‚ especially those with advanced features like Wi-Fi connectivity and a backlit display. Without it‚ the thermostat may steal power from other wires‚ leading to erratic behavior or system malfunctions.
If your existing wiring lacks a C wire‚ don’t attempt to repurpose other wires like the green fan wire. Instead‚ consider running a new thermostat cable (18/7 or 18/8) to ensure proper functionality and avoid potential damage to your HVAC system. A professional installation is often recommended.

Dealing with Extra Wires in the Thermostat Cable
It’s common to find more than the necessary number of wires in a thermostat cable‚ particularly with 18/8 wiring. These extra wires are often unused and safely tucked away within the wall; Don’t connect them to any terminals on the Braeburn thermostat unless you specifically know their purpose and have confirmed compatibility with your HVAC system.
Leaving them capped and insulated within the wall is the recommended approach. Avoid attempting to repurpose these wires for other functions without professional guidance. Incorrect wiring can cause system damage or safety hazards. If unsure‚ always consult an HVAC technician for assistance.

Braeburn Thermostat Installation
Proper installation is crucial for optimal performance. Begin by checking existing wiring compatibility with the Braeburn thermostat’s requirements. Carefully document the current wiring configuration before disconnecting anything – a photograph is highly recommended! If new wiring is needed‚ use 18/7 or 18/8 thermostat cable‚ ensuring sufficient conductors for all connections.

Connecting wires to the Braeburn terminals must be precise. Refer to the wiring diagram included with your specific model. Double-check each connection before powering on the system. Incorrect wiring can lead to malfunctions or damage. If you’re uncomfortable with electrical work‚ consult a qualified HVAC professional.
Checking Existing Wiring Compatibility
Before installation‚ thoroughly assess your current wiring. Document the existing connections – a clear photograph is invaluable! Identify each wire’s color and its corresponding terminal on the old thermostat. Compare this to the Braeburn thermostat’s wiring diagram.
Pay close attention to the number of wires. If you discover more than five‚ the extras might be tucked into the wall; don’t discard them! Ensure you have a “C” wire (common wire) – essential for many Braeburn models. If a C wire isn’t present‚ consider running new wiring (18/7 or 18/8) to accommodate it.
Running New Thermostat Wiring (18/7 or 18/8)
If your existing wiring lacks a “C” wire or sufficient conductors‚ running new thermostat wiring is crucial. 18/7 or 18/8 wire is recommended‚ providing seven or eight conductors respectively. This offers ample capacity for current and future needs‚ including potential smart home integrations.
Carefully route the new wire from your furnace to the thermostat location‚ avoiding obstructions and ensuring it’s securely fastened. Safety first! Turn off power to the HVAC system before handling any wiring. Properly strip the wire ends and label each conductor for easy identification during connection. Consider professional assistance if you’re uncomfortable with electrical work.
Connecting Wires to the Braeburn Thermostat Terminals
Before connecting any wires‚ double-check your furnace wiring and the Braeburn thermostat’s terminal labels. Match the wire colors to the corresponding terminals – typically R (power)‚ W (heat)‚ Y (cool)‚ G (fan)‚ and C (common). Ensure the thermostat is powered off during this process.
Securely insert each wire into its designated terminal‚ ensuring a firm connection. Loose connections can cause malfunctions. If you’re unsure about a specific wire‚ consult the thermostat manual or a qualified HVAC technician. Avoid forcing wires into terminals. A proper fit is essential for reliable operation. Take a picture of the wiring before disconnecting the old thermostat for reference.
Braeburn Thermostat Operation
Operating your Braeburn thermostat is straightforward. To adjust the temperature‚ use the up and down arrow buttons. Tapping the “Hold” button overrides the programmed schedule until you press it again. Adjusting the temperature without using “Hold” creates a temporary override‚ configurable to either cancel automatically or hold for 24 hours within the user programming section.
Understanding these functions allows for flexible temperature control. The display shows the current temperature and the setpoint. Familiarize yourself with the thermostat’s interface to efficiently manage your home’s climate. Remember to consult the manual for model-specific features and detailed explanations of each button’s functionality.
Adjusting the Temperature
To adjust the temperature on your Braeburn thermostat‚ simply utilize the designated up and down arrow buttons located on the front panel. Each press will incrementally increase or decrease the setpoint temperature. The current set temperature is prominently displayed on the screen‚ allowing for easy monitoring. Observe the display to confirm your desired temperature is selected before allowing the system to adjust.
Remember that adjustments made without activating the “Hold” function are considered temporary overrides. These will revert to the programmed schedule at the next scheduled change. For persistent changes‚ utilize the “Hold” button for sustained temperature control.
Using the “Hold” Button Functionality
The “Hold” button on your Braeburn thermostat is crucial for overriding the programmed schedule. After adjusting the temperature to your desired setting‚ pressing the “Hold” button will maintain that temperature indefinitely‚ bypassing the pre-set program. This is ideal for situations requiring consistent temperature control‚ such as during vacations or unexpected schedule changes.
However‚ the hold duration is configurable within the user programming section. You can choose to have the hold remain active until manually cancelled‚ or set it to automatically revert to the programmed schedule after a 24-hour period. Understanding this setting ensures the thermostat operates as intended.
Temporary vs. Permanent Temperature Overrides
Braeburn thermostats offer two distinct methods for adjusting the temperature: temporary and permanent overrides. Adjusting the temperature without pressing the “Hold” button initiates a temporary override. This change lasts only until the next scheduled programming event‚ reverting to the programmed temperature at that time. It’s perfect for short-term comfort adjustments.
Conversely‚ pressing the “Hold” button after adjusting the temperature creates a permanent override‚ maintaining the new setting until you explicitly cancel the hold or‚ depending on your settings‚ for a pre-defined duration like 24 hours. This provides sustained control‚ ideal for extended periods requiring a different temperature.
Programming Your Braeburn Thermostat
Accessing the user programming section on your Braeburn thermostat allows for customized heating and cooling schedules. This feature optimizes comfort and energy efficiency by automatically adjusting temperatures based on your daily routines. The process typically involves navigating through the thermostat’s menu using the control buttons‚ referencing the specific model’s manual for precise steps.
Within the programming section‚ you can configure the “Hold Duration.” This setting determines how long a temperature override—activated by the “Hold” button—will remain active. You can choose between “Until Cancelled‚” maintaining the override indefinitely until manually deactivated‚ or a fixed “24 Hours” duration‚ automatically reverting to the schedule after one day.
Accessing the User Programming Section
To begin programming your Braeburn thermostat‚ you’ll first need to access the user programming section. The exact method varies slightly depending on your specific model‚ so consulting your thermostat’s manual is crucial. Generally‚ this involves pressing the “Menu” or “Program” button on the thermostat’s faceplate.
Navigating the menu typically requires using the up and down arrow buttons to scroll through options‚ and the “Select” or “Enter” button to confirm your choices. Look for options labeled “Program‚” “Schedule‚” or similar terms. Once inside‚ you’ll be able to set different temperatures for various times of the day and days of the week‚ creating a personalized comfort schedule.
Configuring Hold Duration (Until Cancelled or 24 Hours)
Braeburn thermostats offer flexibility in how long a temperature “Hold” remains active. After adjusting the temperature and pressing the “Hold” button‚ you can often configure whether this override lasts until you manually cancel it‚ or automatically reverts to the programmed schedule after 24 hours.
Accessing this setting is usually found within the “User Programming” section of the thermostat’s menu. Look for options related to “Hold Duration” or “Temporary Override.” Selecting “Until Cancelled” keeps the held temperature indefinitely‚ while “24 Hours” provides a temporary adjustment. This customization allows you to tailor the thermostat’s behavior to your specific needs and preferences.
Troubleshooting Common Issues
Encountering problems with your Braeburn thermostat? Several solutions can resolve frequent issues. If the thermostat isn’t responding‚ begin by resetting it to factory settings. This often clears minor glitches. A reset button‚ typically requiring a paperclip to activate‚ is usually located on the thermostat’s front panel.
Wiring problems are another common cause of malfunction. Carefully inspect all connections at both the thermostat and the furnace. Posting pictures of your wiring on platforms like Imgur or Reddit can help others diagnose the issue. If these steps don’t resolve the problem‚ consult the full manual or seek professional assistance.
Resetting the Thermostat to Factory Settings
To reset your Braeburn thermostat to its original factory settings‚ locate the small reset button. This button is typically found on the front of the unit and is often recessed to prevent accidental activation. You’ll need a small‚ straightened paperclip or a similar thin object to gently press and hold the reset button.
Hold the button for a few seconds until the thermostat’s display resets and the code returns to 000. This process erases all previously programmed settings‚ including schedules and temperature overrides‚ returning the thermostat to its default configuration. This is a useful step when troubleshooting or preparing the thermostat for a new installation.
Using the Reset Button (Paperclip Method)
Employing the paperclip method is a straightforward way to restore your Braeburn thermostat to its factory defaults. Locate the recessed reset button‚ usually situated on the thermostat’s faceplate. Carefully straighten a standard paperclip‚ ensuring it’s thin enough to fit into the small opening surrounding the button.

Gently insert the paperclip and press‚ holding it down for several seconds. Observe the display; it should reset‚ and the code will revert to “000‚” confirming a successful reset. This action clears all user-defined settings‚ schedules‚ and overrides‚ providing a clean slate for reprogramming or troubleshooting potential issues.
Diagnosing Wiring Problems
Effective troubleshooting begins with a visual inspection of both the thermostat and furnace wiring. Crucially‚ power must be OFF before examining any connections. Carefully compare the existing wiring to the Braeburn thermostat’s wiring diagram‚ noting any discrepancies.
Post pictures of your wiring connections at both the thermostat and inside your furnace to online forums like Imgur or Reddit for expert assistance – Reddit often removes externally hosted images. Ensure wires are securely connected to the correct terminals. Loose connections or incorrect wiring are common culprits. If unsure‚ consult a qualified HVAC technician to avoid potential damage or safety hazards.
Discontinued/End-of-Life (EOL) Models
Be aware that certain Braeburn thermostat models have been discontinued by the manufacturer. Specifically‚ the Braeburn 3020 1H/1C is listed as an End-of-Life (EOL) product‚ meaning it is no longer in production.
Finding replacement parts or support for these older models may become increasingly difficult. While existing units will continue to function‚ repairs might be limited to available stock. Consider upgrading to a current Braeburn model or a compatible thermostat from another manufacturer. The 3020 1H/1C was a non-programmable‚ low voltage thermostat compatible with single-stage gas‚ oil‚ or electric systems.
Braeburn 3020 1H/1C Discontinuation Status
The Braeburn 3020 1H/1C thermostat has officially reached its End-of-Life (EOL) status‚ as confirmed by manufacturer documentation. This means Braeburn no longer manufactures or actively supports this specific model.
Owners of the 3020 1H/1C can continue using their existing thermostat until it requires replacement. However‚ sourcing replacement parts will become progressively harder. This non-programmable‚ low-voltage thermostat was designed for single-stage heating and cooling systems. Consider upgrading to a newer‚ supported Braeburn model for continued functionality and access to the latest features and support resources. Check with HVAC distributors for potential remaining stock.
Resources and Support
Braeburn provides several avenues for accessing manuals and support. Online‚ you can find comprehensive Braeburn thermostat manuals directly on their website‚ offering detailed documentation for various models.
Visual learners will benefit from numerous YouTube video tutorials demonstrating installation‚ programming‚ and troubleshooting techniques. For personalized assistance‚ the HVAC community offers valuable support. Posting clear pictures of your thermostat wiring – both at the thermostat and inside your furnace – on platforms like Imgur or Reddit (r/HVAC) can yield expert advice. Remember to adhere to community guidelines when seeking help. These resources ensure users can effectively manage their Braeburn systems.
Braeburn Thermostat Manuals (Online Access)
Accessing Braeburn thermostat manuals online is straightforward‚ providing readily available documentation for your specific model. The official Braeburn website hosts a comprehensive library of manuals‚ searchable by model number. These digital resources offer detailed installation guides‚ programming instructions‚ troubleshooting tips‚ and technical specifications.
Downloading a PDF version allows for offline access and convenient printing. Ensure you have the correct model number before searching to locate the precise manual for your thermostat. Online manuals eliminate the need for physical copies‚ promoting sustainability and ensuring you always have the latest information at your fingertips. Braeburn’s commitment to accessible documentation simplifies system management.
YouTube Video Tutorials for Braeburn Thermostats
Numerous YouTube channels offer visual guides for Braeburn thermostat installation‚ programming‚ and troubleshooting. These video tutorials provide a step-by-step approach‚ making complex procedures easier to understand. Visual learners benefit greatly from observing the process firsthand‚ clarifying wiring diagrams and button functionalities.
Search for your specific Braeburn model number to find relevant videos. Many tutorials demonstrate common issues and their solutions‚ saving time and potential service call costs. YouTube provides a valuable supplementary resource to the official manuals‚ offering practical demonstrations and real-world examples. Braeburn-specific channels and HVAC professional channels are excellent starting points for finding helpful content.
Posting Wiring Pictures for Assistance (Imgur/Reddit)
Seeking help with your Braeburn thermostat wiring? Online communities‚ particularly Reddit and forums‚ are excellent resources. However‚ directly posting images to Reddit often results in removal. Therefore‚ utilize image hosting services like Imgur to upload clear pictures of your existing thermostat wiring connections and the wiring inside your furnace or HVAC unit.
Share the Imgur links on Reddit or relevant forums. This allows experienced users to diagnose issues and provide accurate guidance. Detailed photos are crucial; ensure wires and terminal labels are clearly visible. Providing this visual information significantly increases the chances of receiving helpful and specific advice for your Braeburn thermostat setup.
Compatibility Information
Braeburn thermostats demonstrate broad compatibility‚ primarily designed for low voltage systems. Specifically‚ the Braeburn 3020 1H/1C model‚ and many others‚ are well-suited for single-stage heating and cooling systems utilizing gas‚ oil‚ or electric power sources. However‚ verifying your existing system’s voltage is crucial before installation.
Low voltage systems typically operate at 24 volts‚ a standard for most residential HVAC setups. Ensure your system meets this requirement. Compatibility issues can arise with line voltage systems (120V or 240V)‚ requiring specialized thermostats. Always consult the thermostat’s specifications and your HVAC system’s documentation to confirm a proper match for optimal performance.
Compatibility with Single-Stage Gas‚ Oil‚ or Electric Systems
Braeburn thermostats‚ particularly models like the 3020 1H/1C‚ excel in compatibility with conventional single-stage heating and cooling systems. These systems‚ powered by gas‚ oil‚ or electricity‚ represent a common configuration in many homes. The thermostat effectively manages the on/off functionality of these systems‚ providing consistent temperature control.
However‚ it’s vital to confirm your system is indeed single-stage. Multi-stage systems‚ with varying levels of heating or cooling output‚ require thermostats designed to handle that complexity. Braeburn offers models for multi-stage systems as well‚ but ensure you select the appropriate one. Proper compatibility guarantees efficient operation and prevents damage to your HVAC equipment.
Low Voltage System Requirements
Braeburn thermostats are designed for low voltage systems‚ typically operating at 24 volts AC. This is a crucial consideration during installation and troubleshooting; Most residential heating and cooling systems utilize this low voltage control circuit to operate relays and valves‚ ensuring safe and efficient operation.
Confirming your system utilizes 24V is paramount before proceeding. Attempting to connect a Braeburn thermostat to a high-voltage system (120V or 240V) will cause severe damage to the thermostat and potentially create a safety hazard. The wiring should adhere to standard thermostat color codes‚ and a “C” wire (common wire) is often required for consistent power.
Advanced Settings (If Applicable)
Braeburn thermostats‚ depending on the model‚ may offer advanced programming options beyond basic scheduling. These can include cycle rate adjustments‚ temperature differential settings‚ and fan control customizations. Exploring these features allows for fine-tuning the system to optimize comfort and energy efficiency.
Accessing these settings typically involves navigating a more complex menu structure within the thermostat interface. Refer to your specific model’s manual for detailed instructions; Some models allow for configuring temporary overrides to hold until cancelled‚ or for a fixed 24-hour period. Understanding these advanced options empowers users to tailor the thermostat’s behavior to their precise needs and preferences.
Exploring Advanced Programming Options
Braeburn thermostats often conceal powerful programming features beyond standard scheduling. These include cycle rate adjustments‚ influencing how frequently the heating or cooling system turns on and off‚ optimizing for comfort or energy savings. Temperature differential settings control the degree of temperature change needed to activate the system. Fan control allows customization of fan operation independent of heating/cooling.
Accessing these requires navigating the thermostat’s menu‚ often involving holding specific buttons or entering a setup mode. The manual is crucial here. Users can configure overrides to hold until cancelled or for 24 hours‚ tailoring operation to specific needs. Careful exploration unlocks precise control‚ maximizing efficiency and comfort.